How to Clean and Care for Your Horse Riding Helmet
Michelle DrumYour horseback riding helmet is the most important piece of riding equipment you can buy. Your helmet protects you in case of falls and keeps you in spec during competitions, so keeping it clean is of the utmost importance. A well-maintained helmet lasts longer and looks better than a dusty, muddy helmet anyway. In this guide, we’ll share how to keep your helmet clean and advise when to replace your helmet entirely.
When to clean your riding helmet
Keeping your helmet clean is essential to the longevity and effectiveness of your equipment. You also don’t want to wear a dirty helmet during a competition. How often you clean your helmet will depend on how often you ride and the conditions in which you ride. However, as a general guideline, we recommend cleaning your riding helmet on a regular basis–every few weeks, whenever it becomes visibly dirty, or right before a competition. Additionally, you should clean your helmet after an intense, sweaty ride or if it gets exposed to mud, dirt, or excessive moisture.
How to clean your horse riding helmet
Keeping your riding helmet clean is fairly simple. Gather your tools and follow the steps below to keep your horse-riding helmet nice and clean.
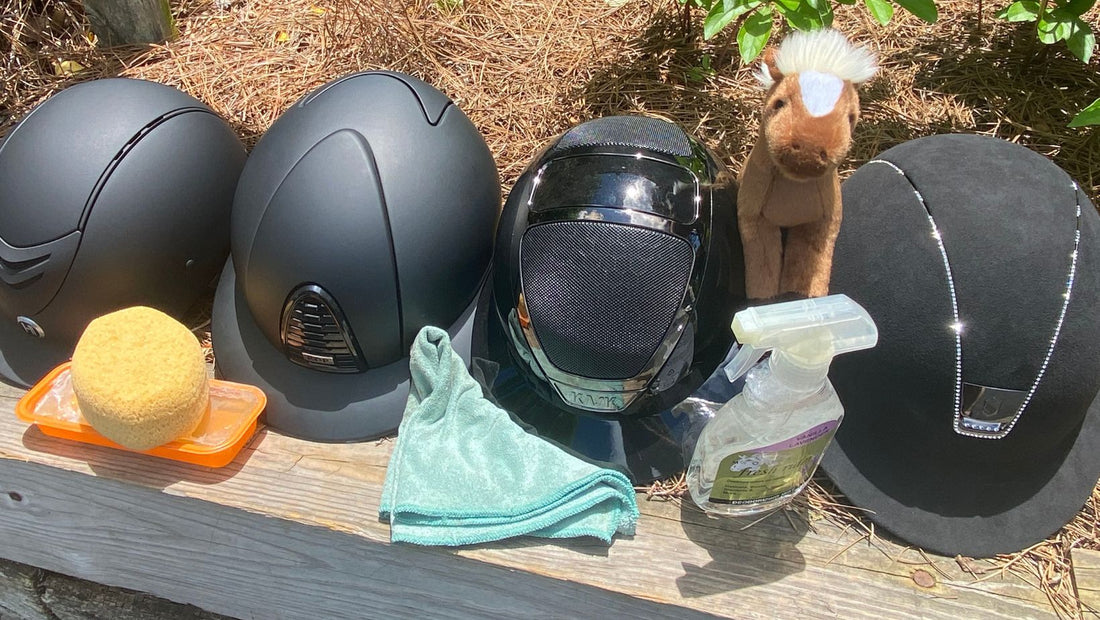
Helmet cleaning tools
- Microfiber cloth or soft brush: This helps prevent scratching the helmet during the cleaning process.
- Mild soap or helmet cleaner: Avoid using harsh chemicals or abrasive cleaners that can damage the helmet’s materials or finishes. Alternatively, there are helmet-specific cleaners and conditioners you can use for optimal maintenance, though these may not always be necessary.
- Warm water: You’ll need warm water for creating a soap solution and rinsing off the helmet.
- Drying rack or clean towel: After cleaning, you’ll need a drying rack or a clean towel to place the helmet on and allow it to air dry. Avoid using heat sources or exposing the helmet to direct sunlight, as they can cause damage.
Clean your riding helmet in 5 steps
1. Remove detachable parts. Take off any detachable parts such as the chin strap or padding if possible, always taking care to follow the manufacturer’s instructions.
2. Clean the exterior. Gently wipe the exterior of the helmet with a soft, damp cloth. Use mild soap or a helmet-specific cleaner if necessary, but avoid using harsh chemicals or abrasive materials that could damage the helmet’s surface and protective coating. Be sure to carefully clean around any embellishments to protect them.
3. Clean any ventilation openings. Pay attention to the ventilation openings and ensure they are clear of any dirt or debris. Use a soft brush or compressed air to remove any blockages.
4. Allow helmet to dry. After cleaning, allow your helmet to air dry naturally in a well-ventilated area. Avoid exposing it to direct sunlight or using heat sources, as they can cause damage to your helmet.
5. Reassemble. Once everything is dry, reattach any removable parts according to the manufacturer’s instructions.
How not to clean your riding helmet
Do not clean your helmet in a dishwasher or washing machine. Any cleaning method that uses high temperatures or agitation will potentially damage your helmet.
How to clean a matte riding helmet
Cleaning a matte riding helmet requires some special considerations to preserve the matte finish and avoid damaging the helmet’s surface. Follow these steps when cleaning a matte riding helmet.
1. When cleaning a matte riding helmet, gently brush off any loose dirt or debris from the helmet’s surface using a soft brush or a microfiber cloth to prevent scratching the matte finish.
2. If there are specific areas with stubborn stains or dirt, use a soft cloth or sponge slightly dampened with warm water. Gently dab the affected area without rubbing vigorously. Avoid using excessive water, as it can damage the matte finish.
3. For particularly dirty helmets, create a soap solution by mixing a small amount of mild, non-abrasive soap with warm water (like baby shampoo or dish soap). Dip a clean, soft cloth or sponge into the solution, wring out any excess water, and gently wipe the entire helmet’s surface.
4. Use a separate clean cloth or sponge dampened with clean water to rinse off any soap residue. Again, be careful not to use excessive water or soak the helmet. Air dry as normal.
How to clean a suede riding helmet
Suede and suede-like materials, like Alcantara, are particularly delicate and require special care when cleaning. Follow these steps when cleaning a suede riding helmet.
1. Use a soft-bristled brush specifically designed for suede or nubuck. Gently brush the helmet’s surface in one direction to remove any loose dirt or debris. Be gentle to avoid damaging the suede.
2. For minor stains, try using a suede eraser or cleanser to gently rub the stained area. Apply light pressure and work in a circular motion. Avoid using excessive force that could damage the suede.
3. For more stubborn stains, you can create a cleaning solution by mixing a small amount of mild soap with warm water. Dip a clean cloth or sponge into the solution, wring out excess water, and gently blot the stained area. Avoid rubbing vigorously, as it can alter the suede’s texture.
4. Dampen a separate cloth or sponge with clean water and blot the area you cleaned to remove any soapy residue. Again, avoid excessive water and soaking the helmet. Air dry as normal.
5. Once the helmet is completely dry, gently brush the suede with a soft-bristled brush in multiple directions to restore the nap and texture. This helps preserve the suede’s appearance and keeps it looking fresh.
How to clean a helmet liner
Helmet liners keep your helmet snugly fitted to your head, making it much more comfortable to wear your helmet for long periods of time. However, these liners need just as much care, if not more, than the helmets themselves. Whether training, competing, or just riding for fun, you’re likely to sweat a little–or a lot. The liner absorbs that sweat to help keep you cool, but it can also start breeding bacteria and producing an odor, especially if it’s not allowed to dry properly.
If you wear makeup, sunscreen, moisturizer, or bug spray while riding, these can also rub off on your helmet liner, trapping bacteria and causing acne breakouts. The compounds in these items can also facilitate an early breakdown of your helmet liner.
Use a gentle soap to wash your helmet liner every few weeks to keep it fresh and free of bacteria. Let the liner soak in the soapy water for a few minutes, scrubbing gently to remove any stubborn stains. Rinse the liner and allow it to air dry completely before fitting it back into your helmet. You should also have an extra liner or two on hand to swap out while washing one, or in case one becomes too soiled to keep using.
When should you replace your riding helmet?
Even with diligent cleaning and maintenance, there are certain situations that call for you to replace your riding helmet with a new one.
After heat exposure
Extreme heat can compromise the integrity of your horse-riding helmet, which is why you should never store your helmet in your car. Though it might seem like a convenient place to store your helmet, the extreme heat and unregulated fluctuations in temperature that occur in your car can cause the components of your helmet to warp and break down. If you’ve been storing your helmet in your car, it may not be able to protect you in case of a fall. We recommend replacing your riding helmet right away.
After a fall
Though the outer shell is the toughest part of your helmet, the inner core is ultimately what protects you in the event of a fall. The inner core of your helmet is made up of multiple layers of microscopic shock-absorbing bubbles that burst on impact, absorbing and protecting you from the force of the fall–only once. The inner core is compromised after a significant impact, which means you should replace your helmet even if you didn’t hit your head directly.
Learn what to do if you fall off your horse.
After 5 years
If you diligently care for your riding helmet, keeping it clean and in a temperature-controlled environment, and manage not to fall, you should still replace your helmet every five years. Your helmet is bound to see regular wear and tear in that time, and manufacturers are likely to produce more effective helmets with more advanced technology. Stay protected and replace your helmet at least once every five years.
If you take care of your helmet, your helmet will take care of you. By following these care and cleaning tips, your helmet is sure to stay in top shape for a good long while. Starting with a high-quality helmet, of course, is key. For all your riding needs, trust Farmhouse Tack to outfit you with the best gear available.
Explore our full collection of staff-tested riding helmets. If you have questions about any of our products, give us a call at 864-457-3557. We’re happy to help!
You might also like: