Spur of the moment: Equestrian guide to choosing the perfect spurs
Allie HarbuckCommunication is key, especially in riding! Spurs are a way to improve the communication between you and your horse.
Young or green horses need time to learn how to respond to leg movement and voice commands before trying spurs. However, if your horse has been training for a while and could use a little extra nudge, then a spur can be used.
If you’re ready to give spurs a try, here are a few things to keep in mind.
A spur is the sum of its parts
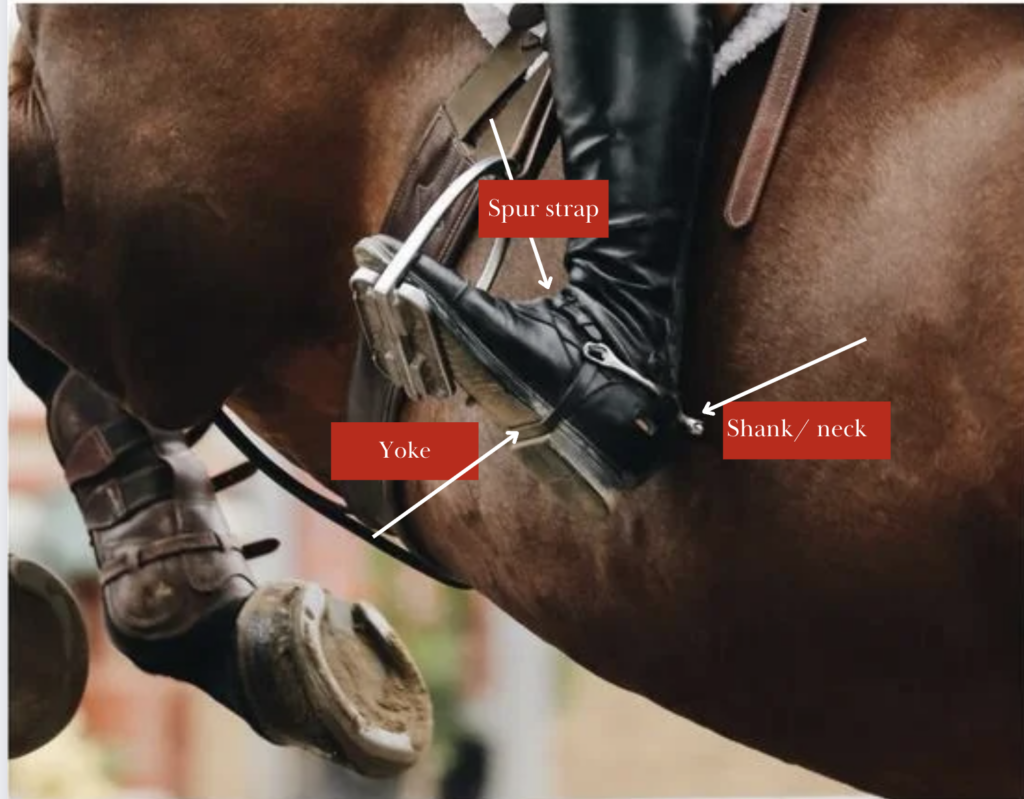
The spur always consists of the same parts but might look different depending on the type of riding you’re doing. Here are the basic parts:
- Yoke- Wraps around the heel of the boot
- Spur strap– Holds the spurs to the boot
- Shank/ neck- The part that touches the horse
- Rowel- A wheel or disk sometimes attached to the shank

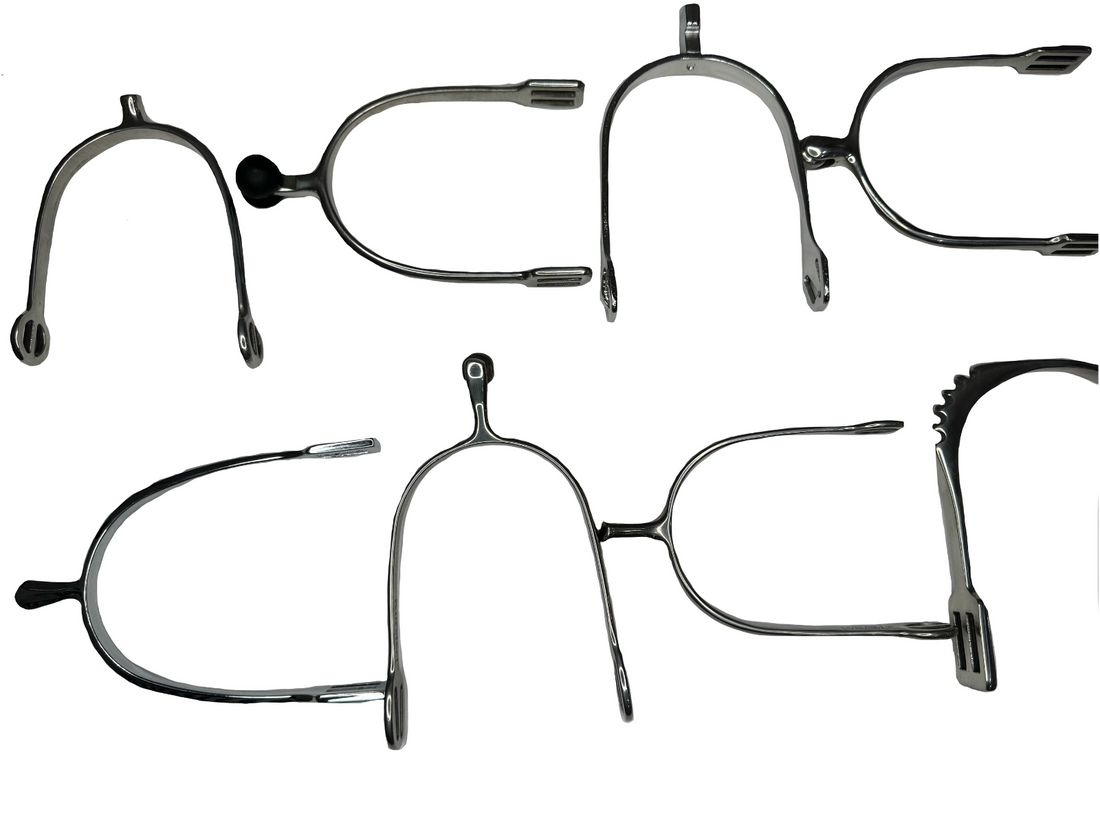
Put these parts together and you get a wide variety of spur designs.
- Round-end: A mild option with a ball at the end of the shank
- Knob end: The end of the shank is squared off but has blunt edges
-
Roller spurs: Have a small disk or wheel at the end of the shank
- Disk roller: A small rolling disk that has no teeth
- Ball: Has a plastic roller attached; ideal for sensitive horses
- Teeth: a blunt-toothed wheel attached that spins; the more teeth, the milder
- Prince of Wales: Have a flat end making them slightly sharper
- Swan neck: Spur goes upward at an angle before leveling off
- Waterford: Has a large round ball that is welded to the rest of the spur
- Le spur: has a spur with small teeth inside the heel band; the rider does not have to turn their heel
Watch this video to see close-up what all of the different spurs look like.
Depending on your riding style, you’ll need a different spur
Depending on the types of movements you and your horse will complete during the show, there may be a preferred type of spur. Dressage typically uses a Waterford-style spur. The disc spur with no teeth or the swan neck are all common to help your horse maneuver through his or her fancy footwork.
Hunter jumper riders use a flatter style, such as the Prince of Wales spur to help encourage movement over obstacles and longer distances.

Once you’ve picked out the type of spurs and style that you want to use, it’s time to make sure you found the perfect fit. Here’s how to try on the spurs:
- Make sure they’re facing the correct direction. You always want the necks of the spurs to be angled downward.
- Most spurs come with one longer branch and one shorter branch. The longer branch goes to the outside of your boot.
- Thread the end of the strap through the bottom of the inside branch leaving enough excess strap to put under your heel.
You should be able to slide on your boots easily and rest on the spur ledges. They should be a little bit wider than the heels of your boots so they can move slightly up and down. They should not be so loose that they fall onto your heel bases, but, they shouldn’t be so tight they won’t move up and down at all. You can watch a demonstration of how to put on your spur straps below.
Check out our blog for more on how to fit your new spurs.
Now that you’ve got the perfect style and perfect fit, you’re ready to ride off into the sunset with your new spurs. Check out our website or come by the store so we can help you find the perfect pair.
